Saiba como converter um simples ventilador existente dentro dos computadores actuais num sistema de produção de energia eléctrica como um micro-aerogerador.
O texto e instruções estão em inglês, mas são de fácil compreensão. Alguma dúvida coloquem nos comentários.
A study conducted by the United Nations Environment Program (UNEP) over a period from 2005 to 2007 in 12 countries showed some troubling numbers. The report estimates the amount of electronic waste generated from PCs alone in china to be 300,000 metric tons/ year.
Brazil takes the second position with 96,800 metric tons per annum and India stands third at 56,300 metric tons annual. Clearly these trends are not sustainable, considering the forecast for increase in the e-waste output is 150 – 200 percent.
So, unless we want to our children to be living in houses built on piles of hazardous waste, it is time to give recycling a serious thought. And as this project from Instructables shows, recycling e-waste need not be an expensive endeavor. Get set and green your world.
PROJETO
Difficulty Level:
Easy, meaning anyone can do this, even a beginner.
Time required
If you are comfortable with soldering, this should not take you more than an hour. But if you haven’t tried soldering before, you might want to get the hang of doing it first. Soldering can be tricky business.
Estimated cost
Well, the point of this exercise is to re-use old stuff. So, we suggest you try finding everything you need at home or in your garage. Or may be in your neighbors’, for that matter. There are some things you might have to buy and this should not cost you more than fifty dollars.
Resources required
- Thick plastic bottles
- Old PC fan, bigger the better!
- A few feet of small wire
- A piece of wood about 1.5″ square and around 20cm long
- Two lengths of steel tubing that slide inside of each other, about 1/2″
- 4 Schottky diodes, I used BAT85 but any will do
- Epoxy
- Super Glue
- Zip ties
- An old CD
INSTRUÇÕES E PROCEDIMENTOS
Dismantle your PC fan
 To dismantle your fan, you will first need to tear off the sticker at the back of it. Under the sticker will be a rubber seal that can be peeled. Once the seal is out, a small circlip will be revealed.
The circlip or snap ring is flexible metal ring that holds the fan together. You can remove this using a screw driver. Once done, you should be able to pull out the blades of the fan.
Soldering the wires
 Depending on the design for your fan, there will be two or three wire legs that connect to the coils. You need to find the two legs that have only one copper wire connected to them. The third leg, if present would have two copper wires connected to it. You have to extend these two legs by soldering a length of insulated wire to each.
Once the soldering is complete, you can remove any other electronic component from the board as these wouldn’t be used.
Building the rectifier
 This is where the diodes come in. The rectifier is required to convert the AC output to DC power. On your diodes, you will see a Black strip on one side. Lets call this the A side and the opposite side the B side. Now, in two diodes the A side leg is to be shortened to 1 cm and on the other 2 diodes are to be shortened to the same length. All the long ends can now be soldered together.
Then, solder the three wires to where the two diodes are connected. This should complete the rectifier as shown in the picture above.
Test the alternator
 At this stage, your alternator should be working. The easiest way to check this is with the help of an LED. After you have fit the blades back in, connect the LED to the outputs and give the blades a strong spin. The LED must light up to confirm that the alternator is working. Alternately, you could use a multimeter as well.
Remove all unnecessary plastic
 At this point you can remove all the unnecessary plastic around your main components like the blades, the plastic box casing etc. You can use a knife or a wire cutter to do this.
Making the blades
 For making the blades you will need thick plastic bottles, preferably not the plastic cola bottles. Use one like the one in the picture.
You can cut the bottom and top of the bottle to give you a tube like structure. Then cut the tube lengthwise to get a sheet of thick plastic. Make a template on paper or cardboard and use the template to ake sure all your blades are the same shape and size.
Glue the blades to the motor
 Use the super glue to affix the blades onto the hub of the alternator. Since the blades are cut from a bottle the blades have a natural curvature and no other adjustments as to the blade’s angle will be necessary.
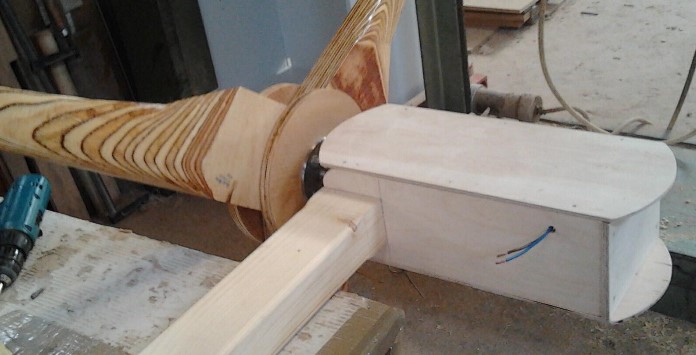
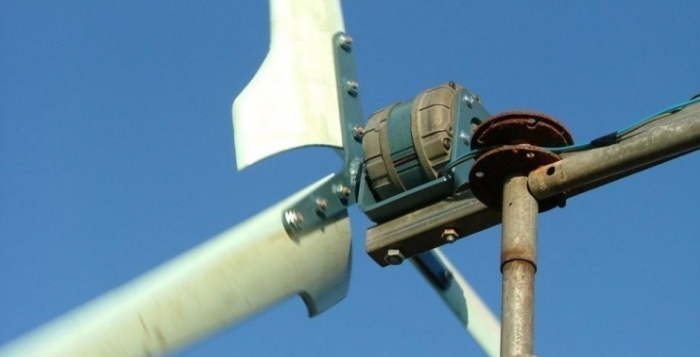
Make the tail and alternator mount
 The alternator is fixed on to a wooden board that is pivoted on the steel pipes. You can use the CD to make the tail. On the bigger pipe, drill a hole big enough to hold the smaller pipe. Fit the smaller pipe in and on the other end of this pipe, the CD is affixed to act as the tail.
Use the epoxy to seal any gaps in these joints. You can use screws to attach the wood and epoxy to attach the alternator on the wood. Use the zip ties to hold the wires in place.
Frequently asked questions
1. Where can I test my model?
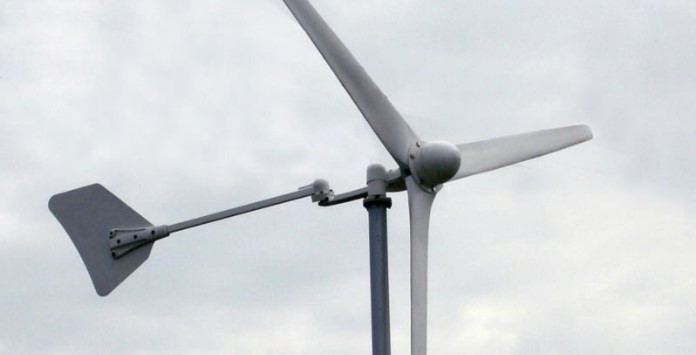
While it should be possible to run this model anywhere, we suggest that you first try it indoors before taking it out to the real wind. The design of the larger windmills is complex and those turbines wouldn’t even move under a fan. But the simpler turbines may not work well in natural winds.
2. What can I do with this windmill?
First you can try collecting some data on the power generated using a multimeter. then you can start experimenting with different blade designs and loads. If your design is good, you might well be able to power a small light bulb or motor with it. Learn more here.
3. How do I learn to solder?
There are several resources to learn how to solder. You could use this tutorial or this one from Instructables.
Quick tips
- You could use this windmill to recharge your batteries. You will need to add an extra diode in the output circuit to avoid the batteries running the motor.
- You could avoid making the rectifier and use a ready-made one available in the market.
- You could make several of these to start your own small wind farm and experiment with harvesting that energy.
Things to watch out for
If you are working with larger motors with blades of three to five meter diameters, the power generated could be significant.
Care must be taken to first be aware of the power and to make sure that ends are insulated. Also, larger designs tend to get unstable in strong winds. Please take care to make sure the windmill is well grounded in this case.