Planos de construção detalhados para o desenvolvimento de uma turbina eólica caseira usando um motor passo a passo de uma impressora.
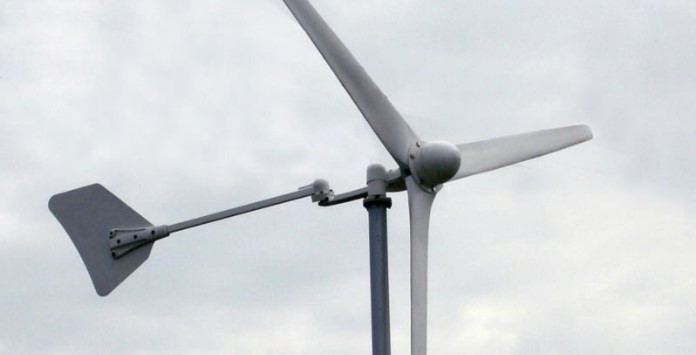
The Micro Mill is a fun little weekend project, and can be used to light a LED, small light bulb, or even charge a couple of NiCad batteries.

Parts Required
- Stepper motor from old FDD or Printer. The square type is easier to mount.
- 25mm PVC pipe, about 200mm long
- 90mm PVC pipe, about 350mm long
- 4 of 3mm diameter 30mm screws
- 200 * 150mm piece of 3mm ply wood
- Stainless Steel hose clamp to suit stepper motor diameter + 10mm
- Double AA battery holder and lead
- Veroboard
- 2 full wave bridge rectifiers
- 47uF 63volt capacitor
- 10ohm 5 watt resistor
- hookup wire
First up remove the stepper motor from the old FDD or printer. The square type, as shown here, are preferred for this project as they are easier to mount.

Next you will need to remove the aluminium wheel from the stepper motor shaft. Easiest way I’ve found is to mount the stepper motor in a vice with the wheel up, then quickly heat the wheel with a small gas flame ( blow torch ) while prising upward with a couple of screw drivers or long nose pliers.

As soon as the wheel is free spray the stepper motor with water to cool it off. Excessive heat in the stepper motor will damage the magnets.

Next drill two 3.5mm holes through the wheel, on each side of the centre hole. Press the wheel back onto the stepper motor.

Cut the length of 90mm diameter PVC pipe length ways in two places at 90 degrees apart, to provide a length of quarter pipe as shown.

Drill a couple of 3.5mm holes in the middle on the quarter 90mm pipe as shown. These holes need to match the holes drilled in the aluminium wheel.

Next cut the pipe as shown. This gives us our propeller profile. Clean up all edges with a file and sand paper to remove any burs.


Cut and drill the piece of 25mm PVC pipe as shown. The slot at the back needs to be wide enough to fit the tail into.

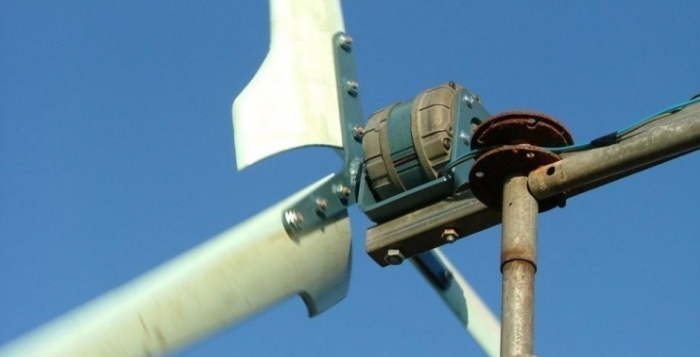
Using the stainless steel hose clamp, clamp the stepper motor to the 25mm PVC pipe as shown. Make sure it is tight. Once in place it should not move.
Next you need to put together your circuit board, details are on the next steps.

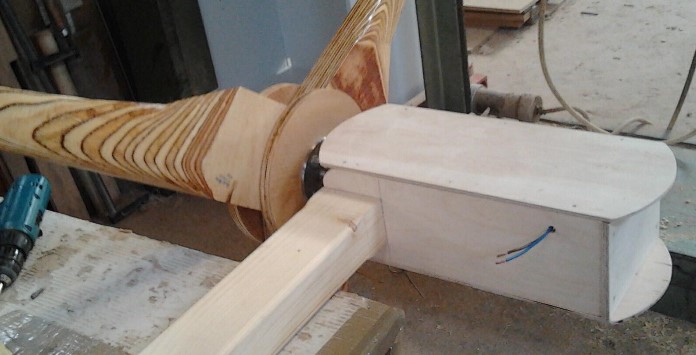
Cut the 3mm ply wood to a tail shape ( any shape will do, get creative! ) and screw to the 25mm PVC pipe as shown. Position the rectifier circuit board and battery holder on the tail, mark hole location and then drill the tail to suit.

Once you have assembled the rectifier board, screw it and the battery holder in place and wire to the stepper motor.

Lastly bolt the propeller onto the stepper motor. A couple of drops of engine oil on the bearings will help protect them from the weather.

And that’s it. You can now mount the windmill on a post with a 8mm bolt screwed into the top as a mast.

 Stepper motors can come in various wire formats, from 4 wire to 8 or more wires.
Use a multimeter to determine which lead is which, then connect a couple of bridge rectifiers as shown.
As the mini windmill uses a small two blade design the RPM will be quite high ( very high! ). Therefore I would use high speed rectifiers and a smoothing capacitor to reduce electrical noise in the output.
Once you have the wind mill up and going, measure the output voltage. If you intend to run voltage sensitive devices from the windmill output, I would recommend a 5 watt zener across the output.
To use the Mini Mill as a battery charger I used the following circuit. You may need to adjust the resistance or R1 to achieve a good charging current based on. Charging current should be 1/10th of rated battery current for 10 hours to achieve best battery life.

Further Suggestions
Garden lights
Change the double AA battery holder for a quad C battery holder to give you 6 volts worth of Nicad batteries. Design a circuit to using a light dependant resistor to turn on a mini relay and mount that on the windmill along with a 6 volt lamp ( as used in a torch ).
During the day the windmill charges the nicad batteries, and at night the lamp turns on to light up the area.